
")


MATERIALS: This project is so simple and requires so little! You could use any color garland and any color ribbon or twine. I love the rustic feel of this brown twine against the shiny gold garland. 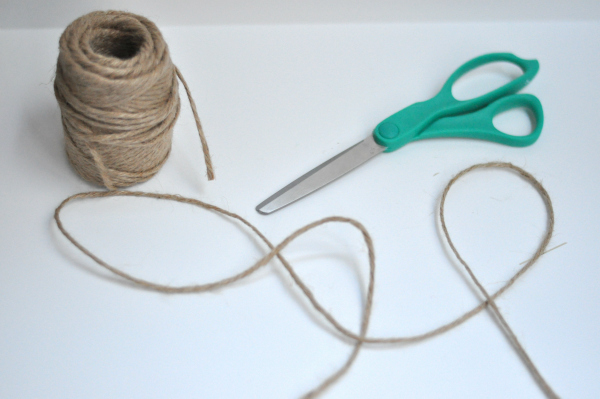
STEP ONE: Cut your twine! I made my garland to fit over my bar area and had a vague idea of the size in mind. You can make this as short or long as needed.

STEP TWO: Cut your metallic garland. You want each piece roughly 2 inches wide. I didn’t use a ruler and just eye balled it – you’ll want to do this outside or on a drop cloth as cutting the garland is a bit…sparkly :)
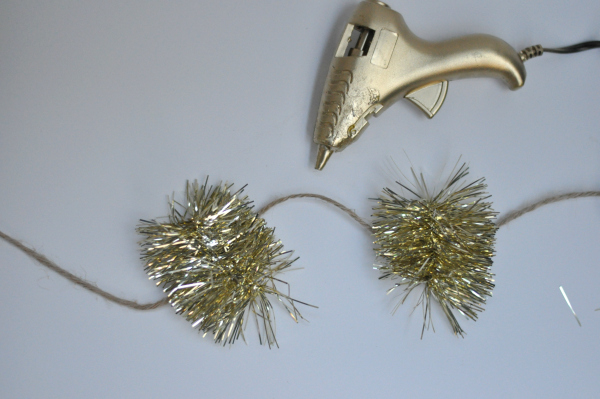
STEP THREE: Lay out your twine and space out your metallic garland pieces to see how far apart you want them. Place a piece of garland on a magazine, drop cloth or other disposable surface and put a small dot of hot glue in the center. Immediately lay the twine on top and press down to secure. Be careful of touching the hot glue- you can use a skewer, pencil eraser, paint brush end or other small pointy object to do this. Continue to glue each piece of garland on the twine. Once the glue has dried (it doesn’t take long!) flip over your twine and secure a piece of garland on the other side, creating a “sandwich” with the twine in the middle of two garland clusters. Voila! Let dry then hang.

PS- The winner of the $200 gift card to Beso.com is SHIRA ROSENBLUTH, congrats!!


DIY: Holiday Garland
VIEW THE COMMENTS