

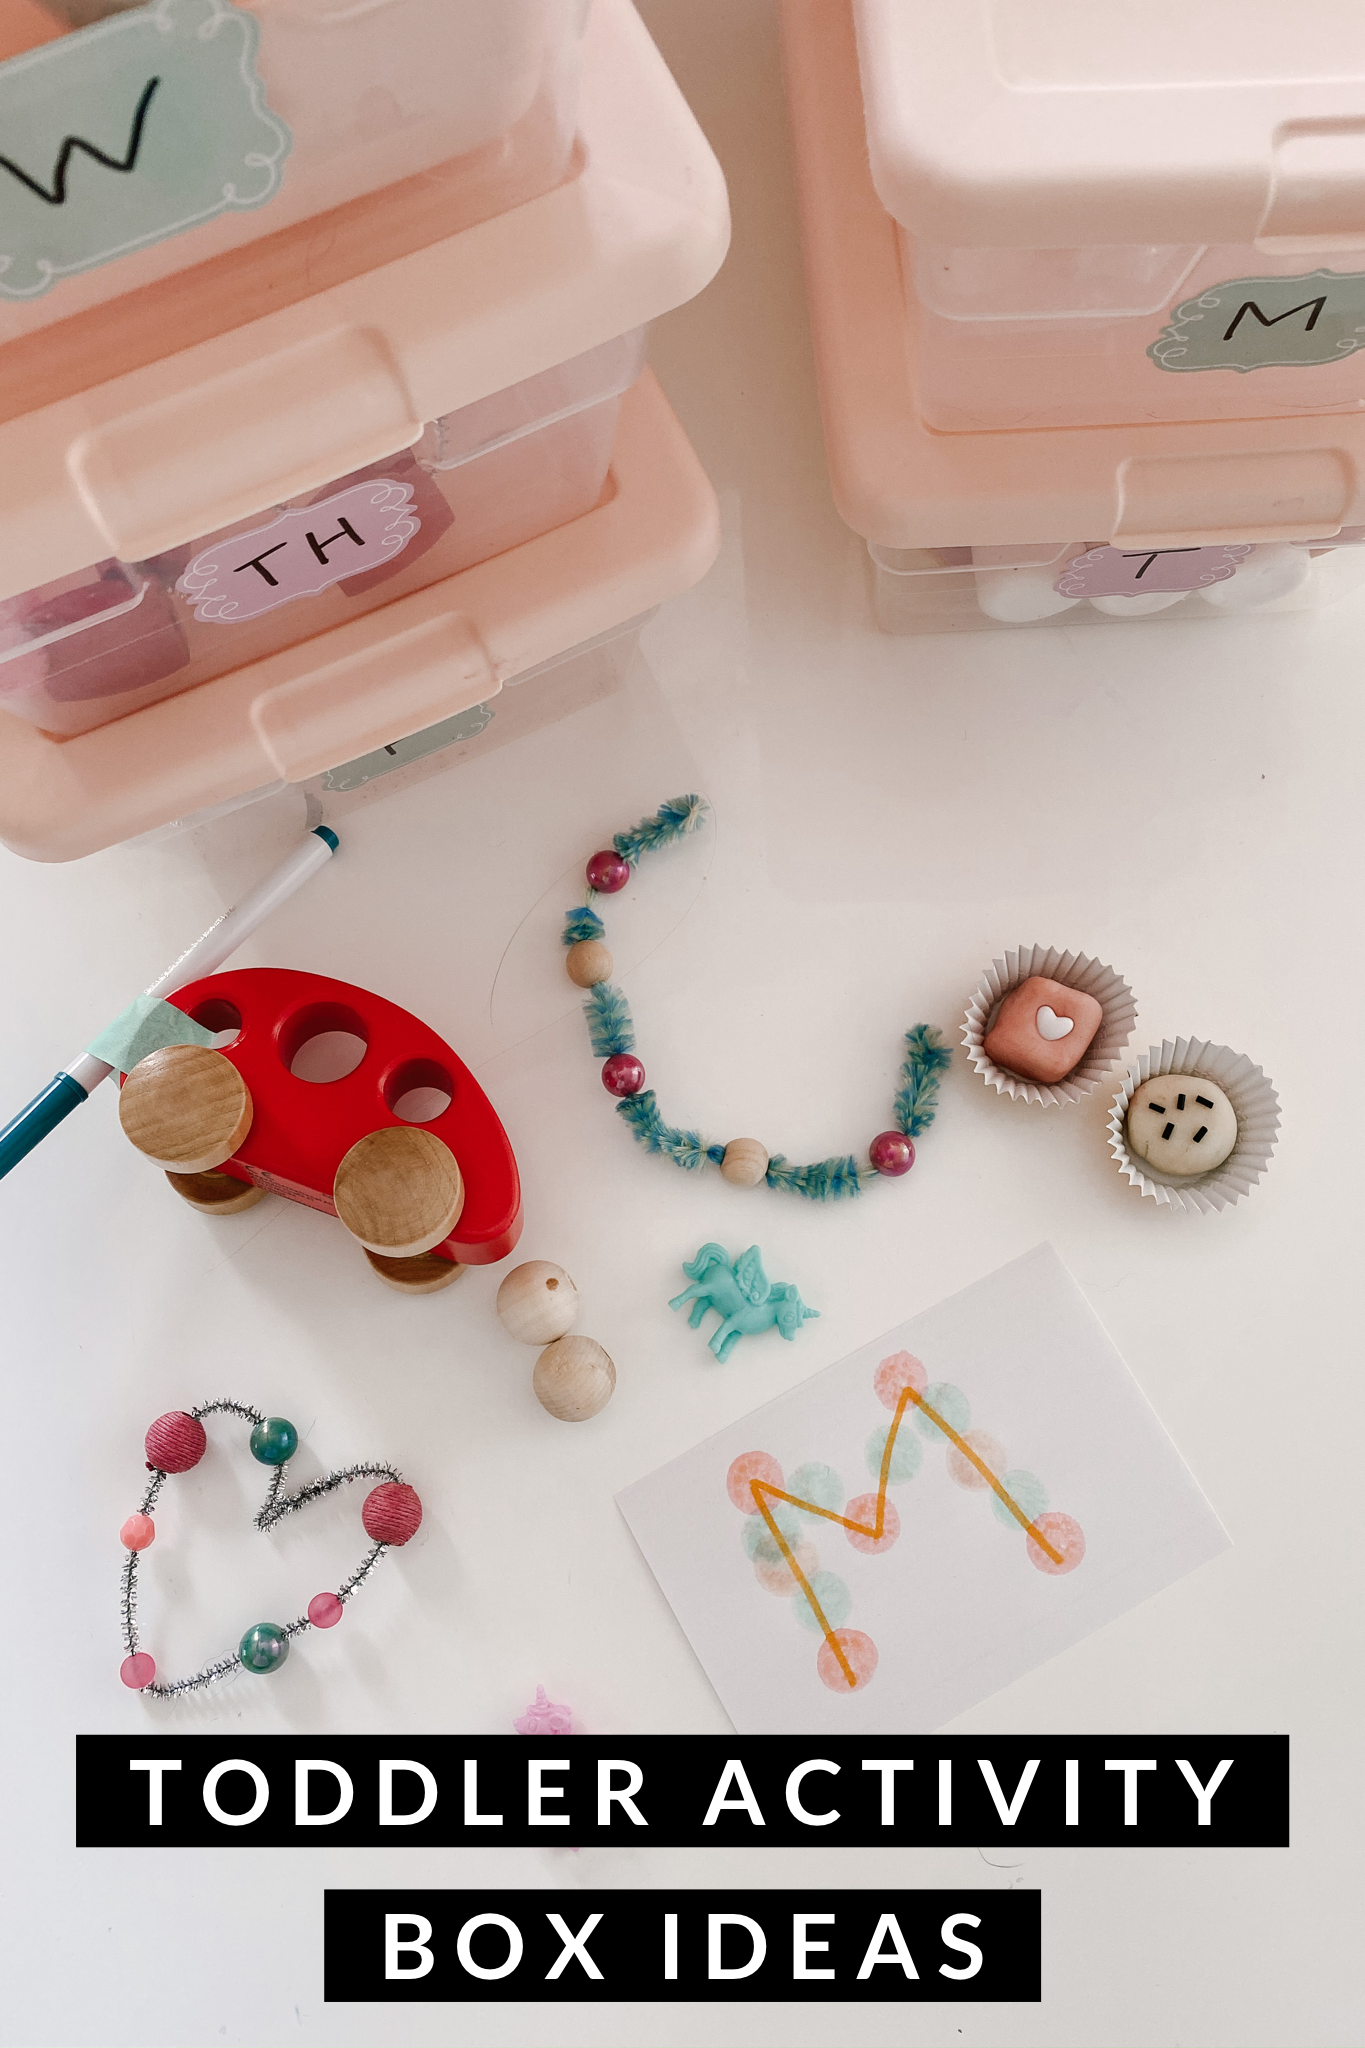
If you’re new around here maybe you haven’t heard about my activity boxes, so here’s the deal! I started doing them a few years ago with my toddlers as a way to set up our activities for the week. When my girls were young (12-18 months) I found I most needed them to be entertained in the mornings and in the evenings when I needed time to do other things like make breakfast or dinner. Since they’ve grown, the boxes have evolved too! Whenever I share these posts I get a lot of questions so I’m going to try and answer them below.
I love organizing our activities this way for a few reasons.
- I take some time on Sunday to put them together and then I’m SET for the week.
- Now that I have 2 active toddlers who play very independently most of the time I save my activity box for when I think they really NEED it (cranky, meltdowns, end of day etc.) and I have something ready up my sleeve!
- These boxes give ME time. Yes some of these activities require your attention and assistance but others will FREE UP YOUR TIME.
- I feel less guilt about ‘not doing enough’ with my kids. Something that used to weigh on me heavily. I head into the week knowing I have 5 fun, educational, sensory activities that my kids will do throughout the week.
+You can adapt these boxes for whatever age your children are, but they were created for my 4 year old with adaptations for my 2 year old. Meaning they work for 2-4 years old.
+You can start ‘activity boxes’ at any age! I’d suggest 12 months when they are sitting up and starting to move. It’s fun to put together boxes for this younger age set because they are so curious about any and everything! It takes a lot less effort on your part! Here are some ideas for younger toddlers!
See more activity box ideas HERE and holiday activity box ideas HERE!
These are the boxes that I use, unfortunately shipping is no avilable but you can order online and pick up in store! These are similar and come in a variety of colors. Labels on these boxes are from Target dollar spot!
Ok, so let’s dive into what I have put in the boxes this week! With Valentine’s Day a few weeks away we have a slight love theme going on here :) For reference, Flora is 2 years old and Piper is 4.5 years old!
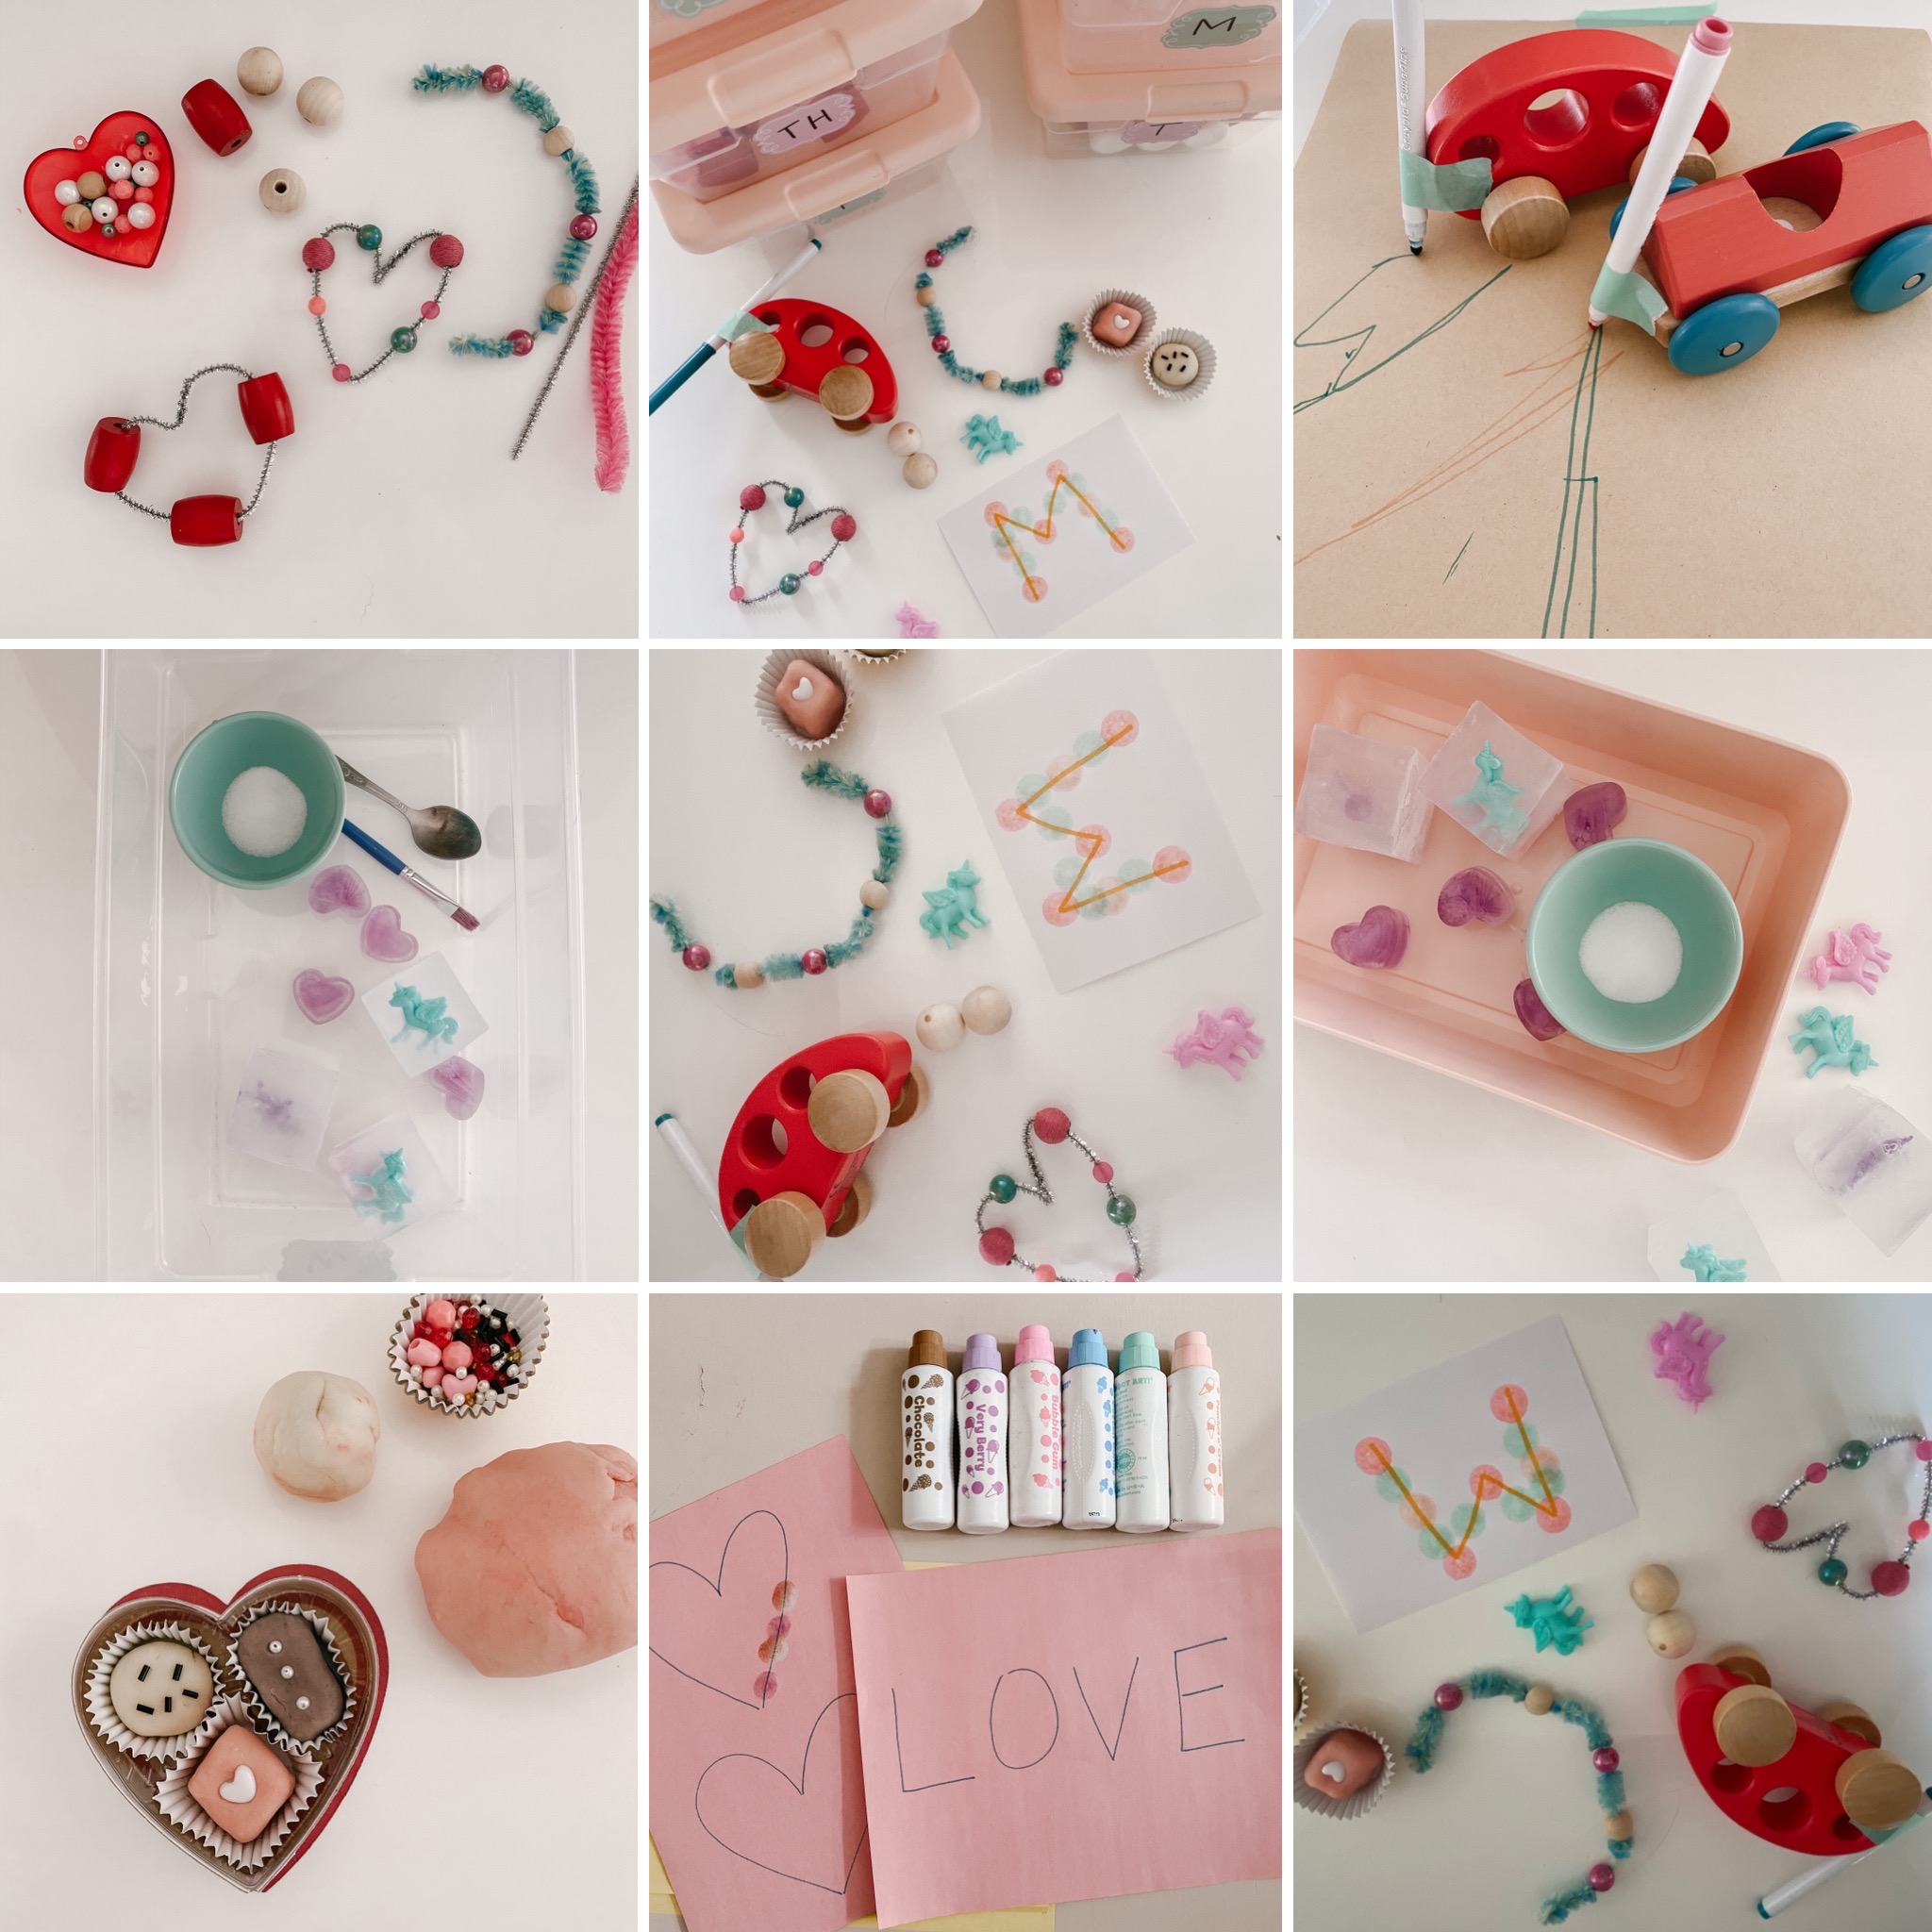
Valentine’s Day Playdough “Chocolates”
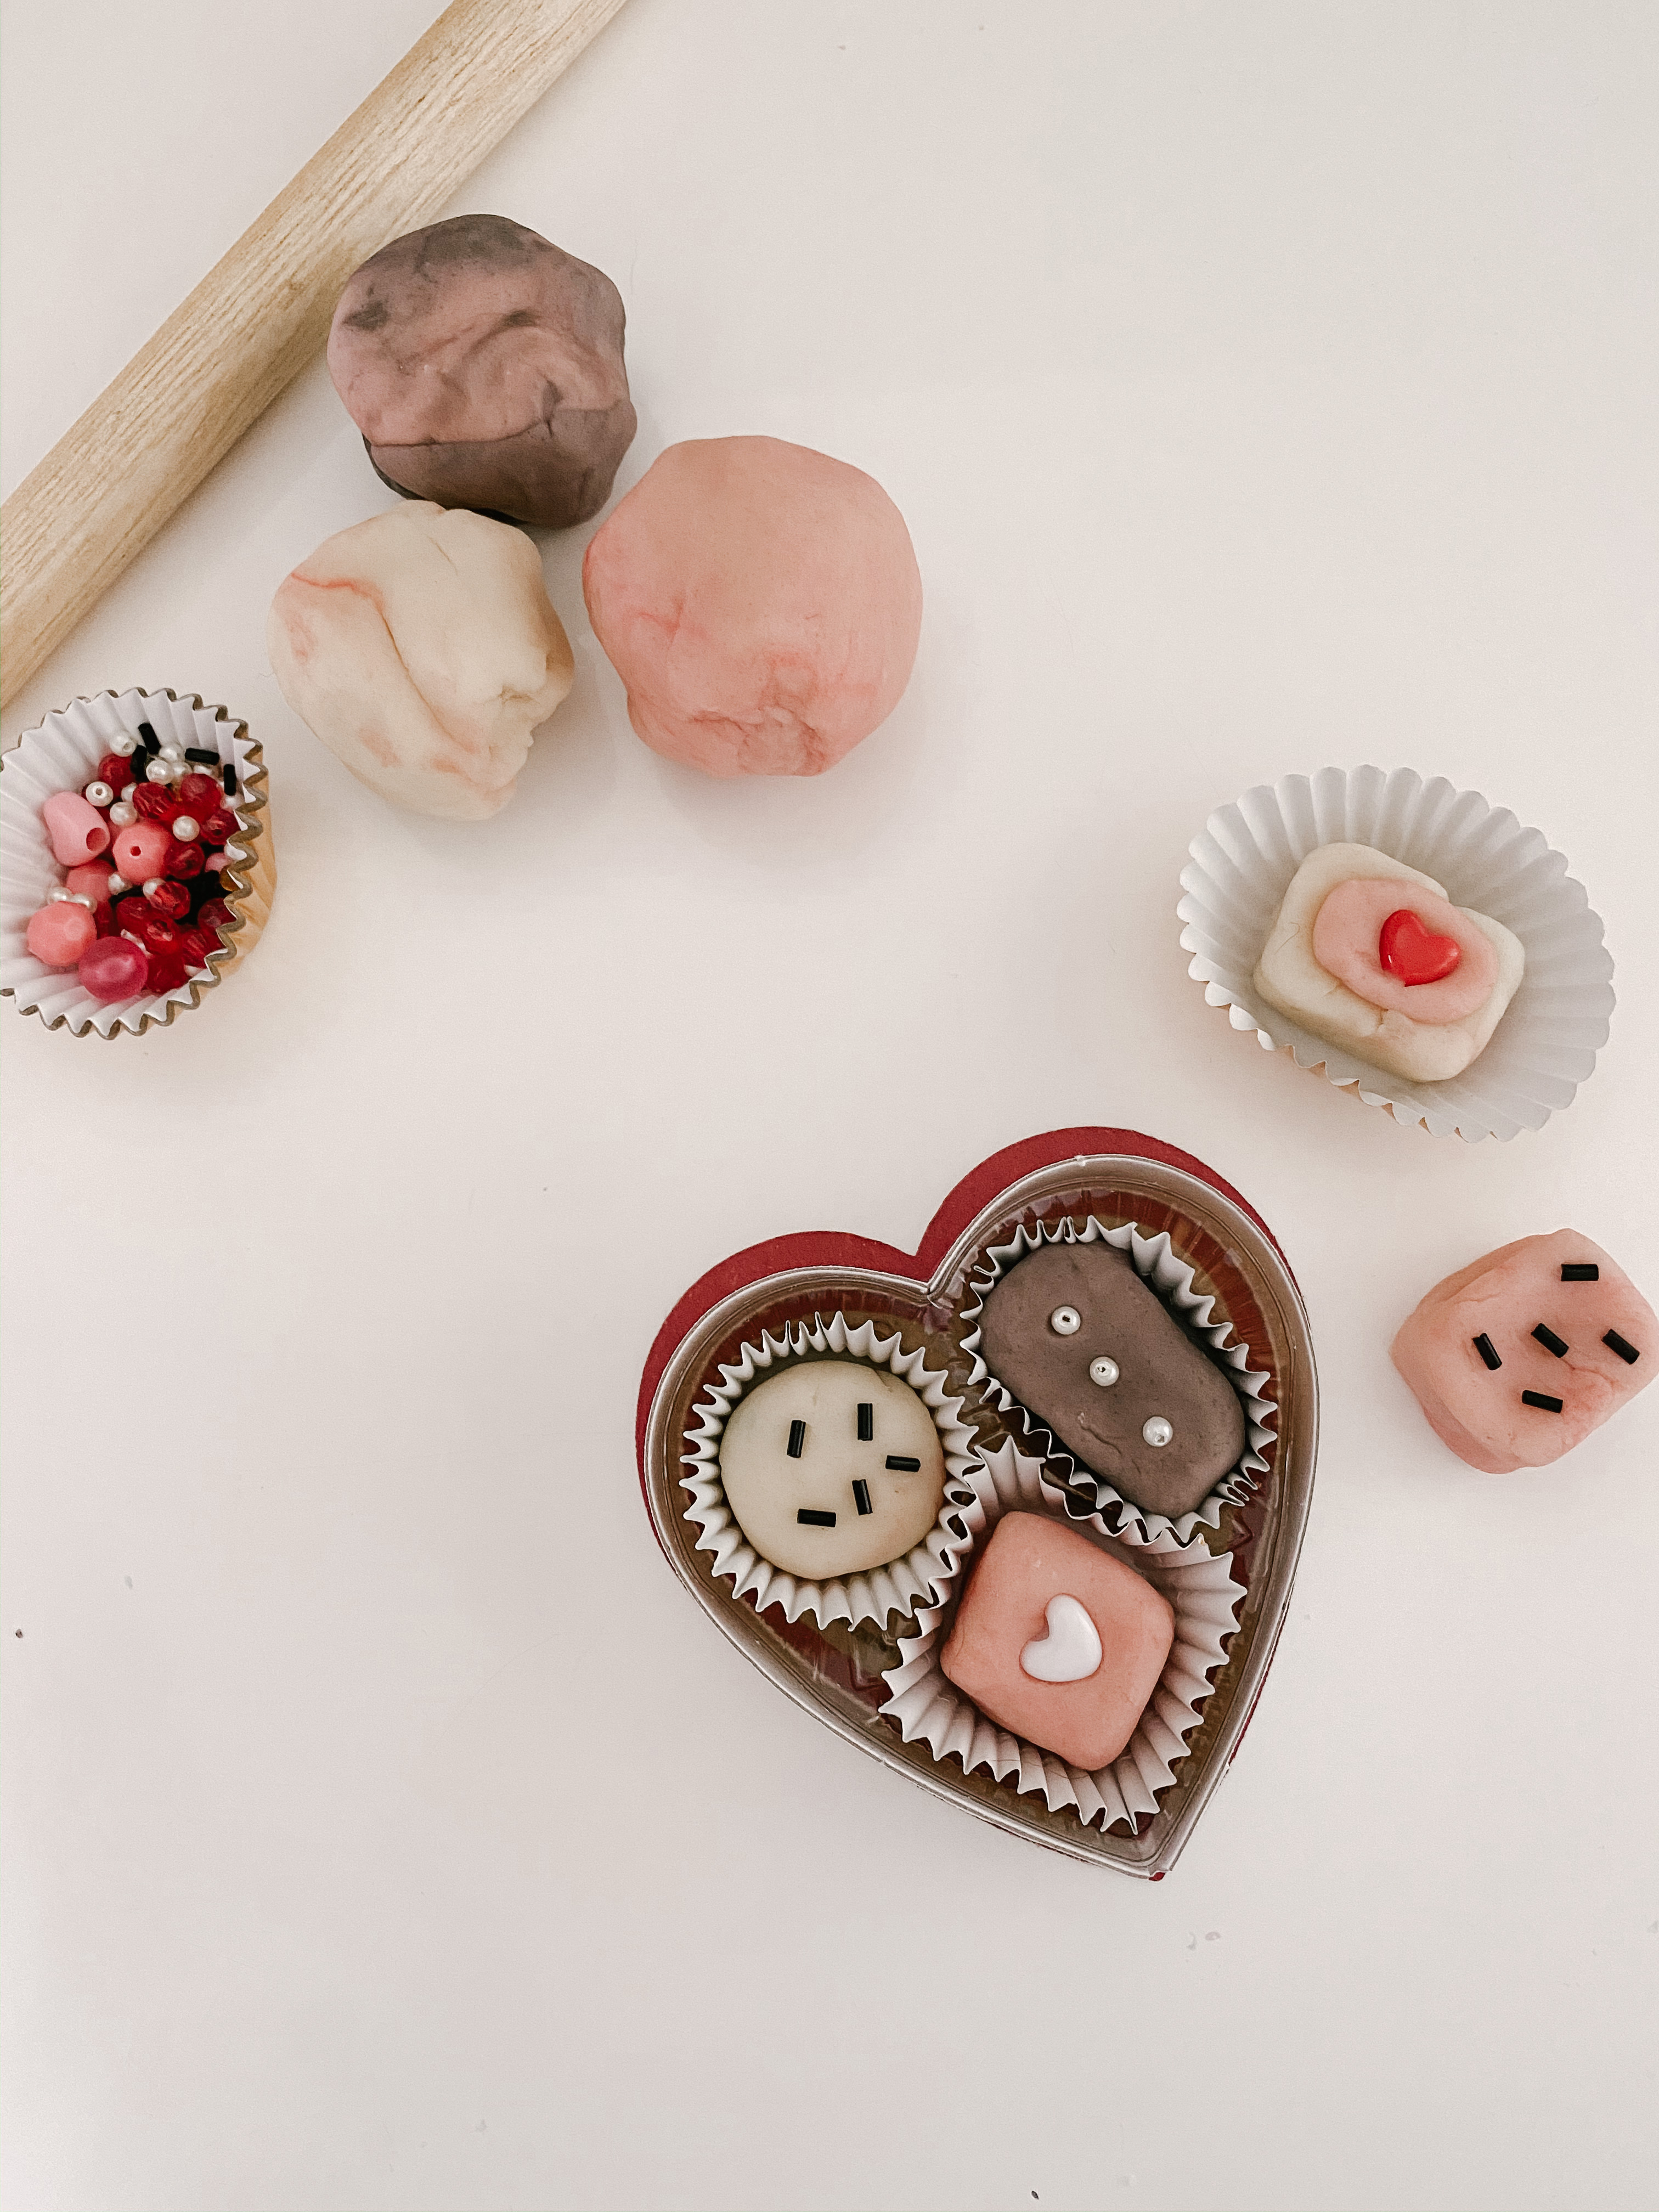
All you need for this invitation to play is an empty Valentine’s day chocolate container and mini cupcake liners to hold the playdough creations! I used a mix of beads to act as the sprinkles but for younger kids you could also use sequins!
Supplies: Mini cupcake liners, empty box of heart chocolates.
Ice Cube Escape
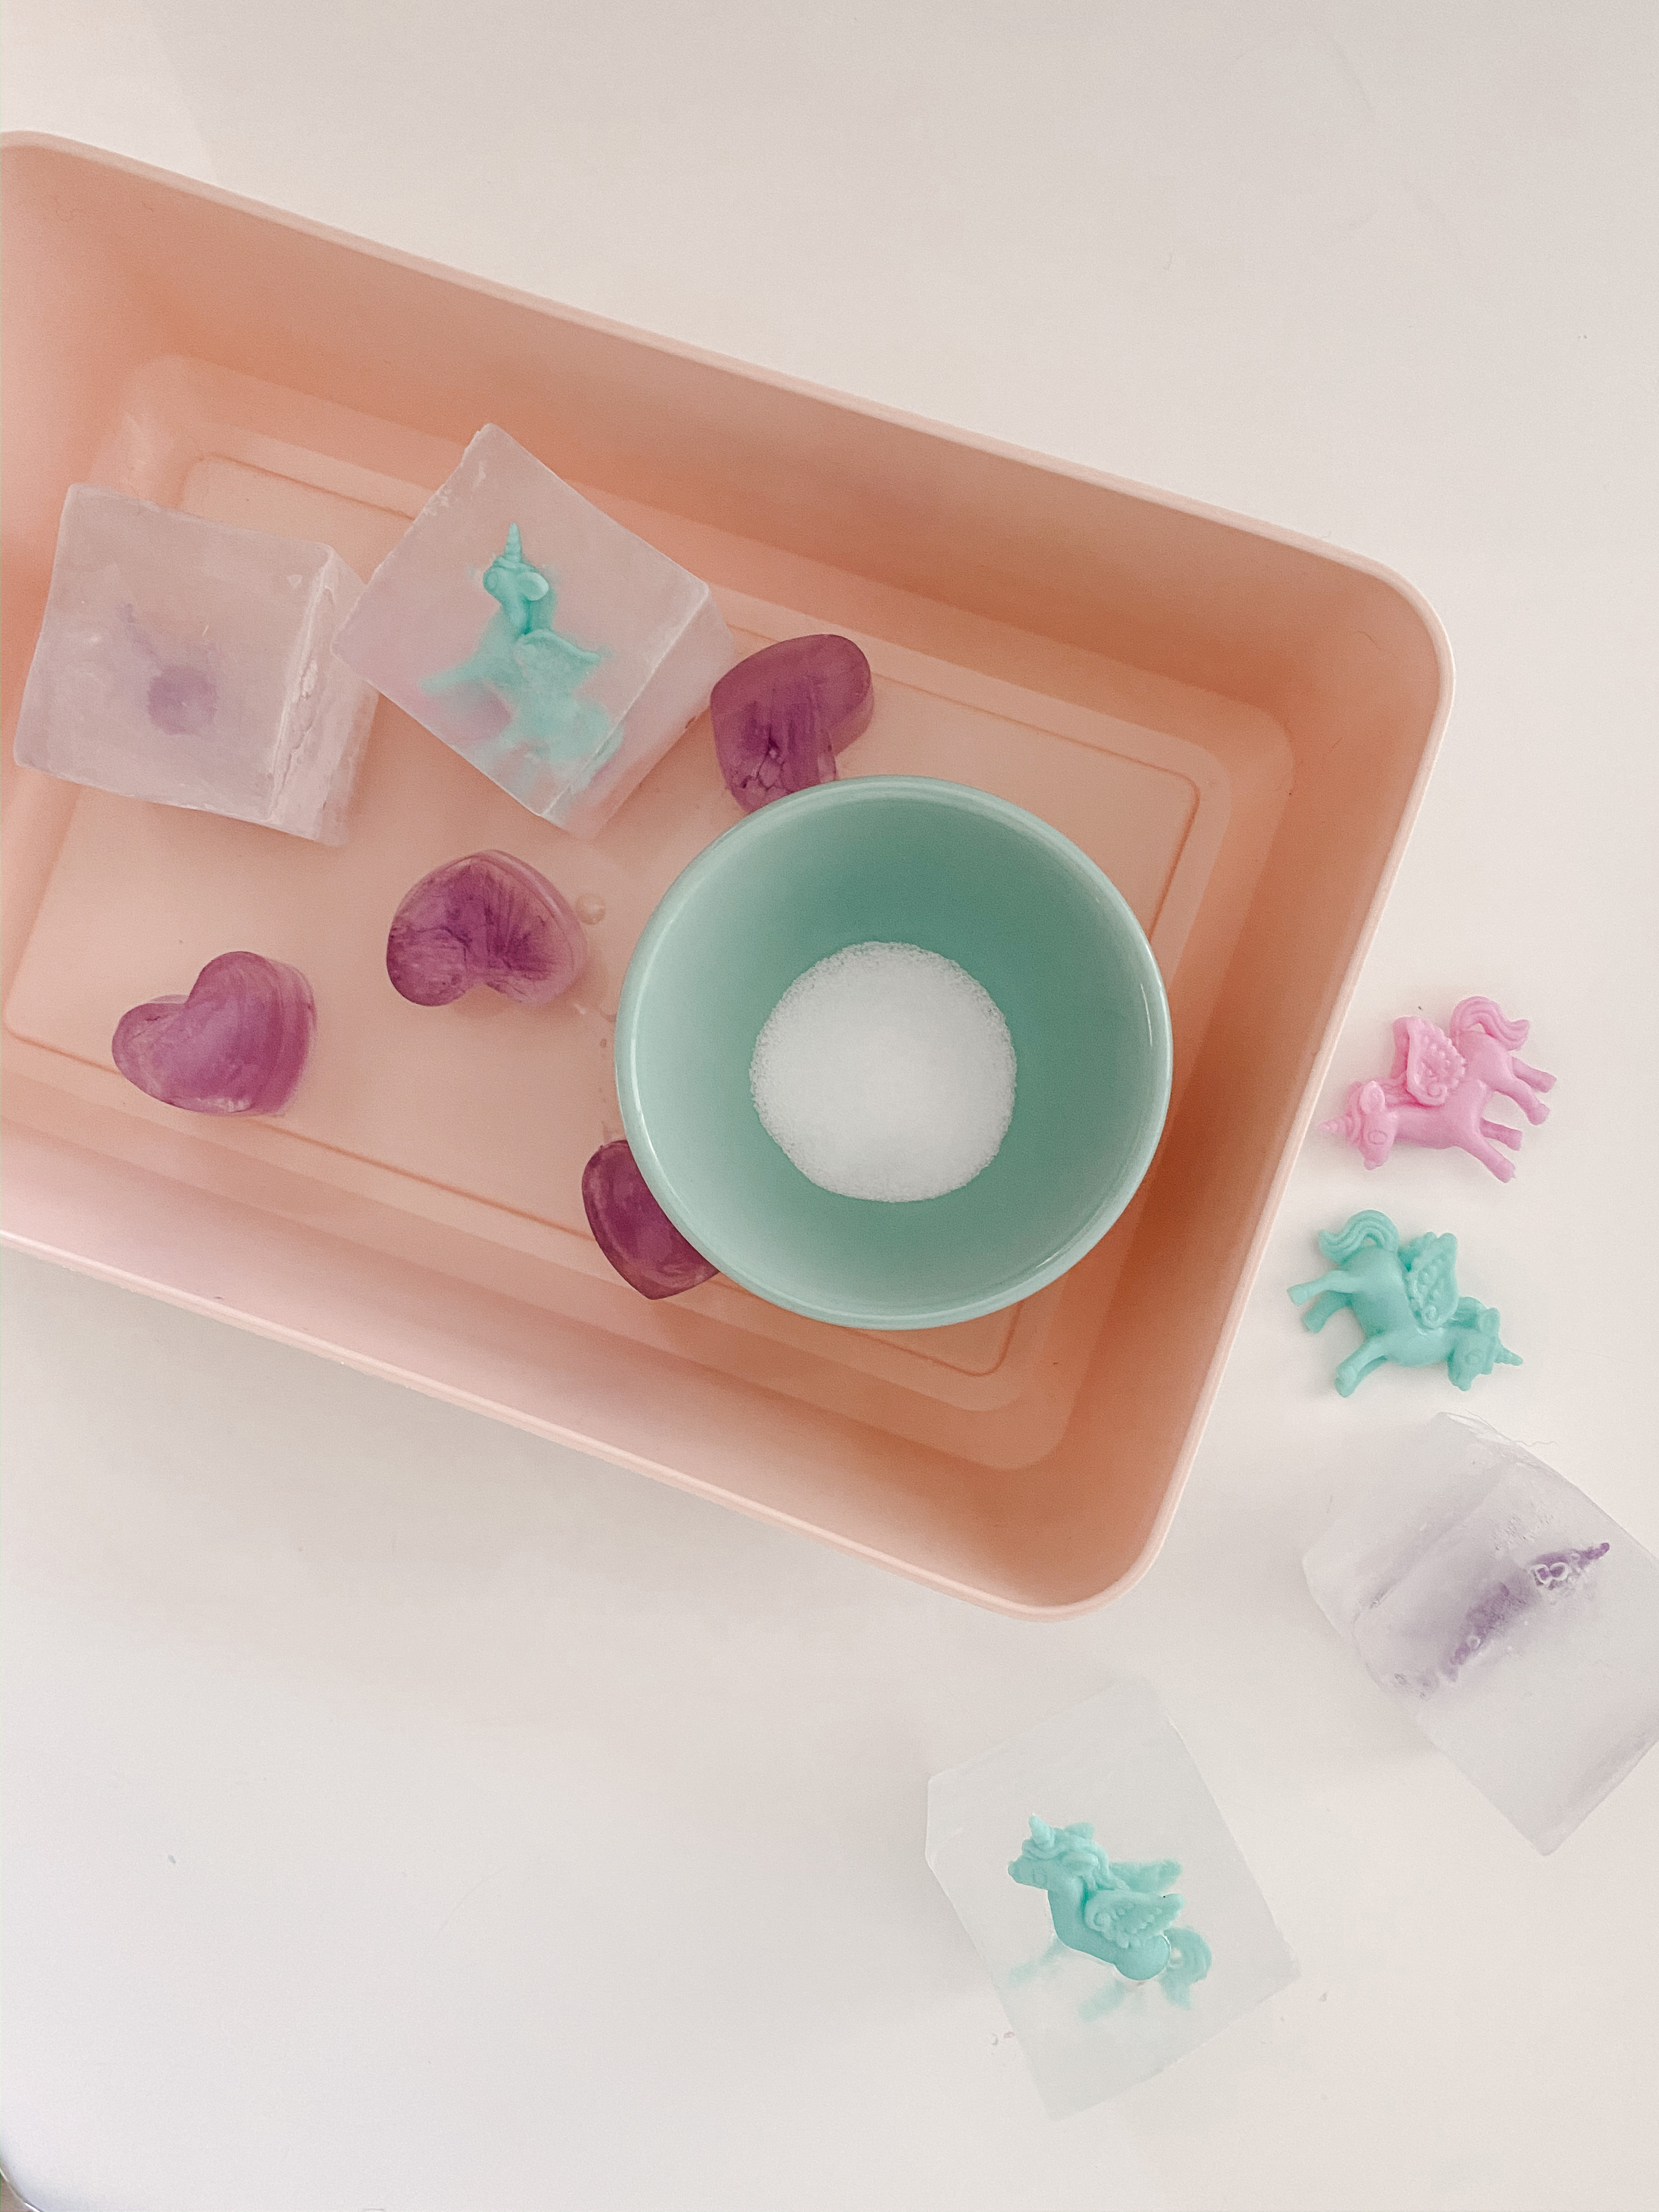
Ice cube play isn’t new around here but it continues to always be such a hit with my girls. This time I just stuck plastic unicorns into my silicone ice cube molds. I also used plant based food coloring to dye water and put it in my heart ice cube tray. I give the girls salt and a paintbrush to experience some science as they melt the ice cubes. These have also been a HUGE HIT in the bathtub!!! You can use ANY type of small toy – we love doing this with our little dinosaurs, too!
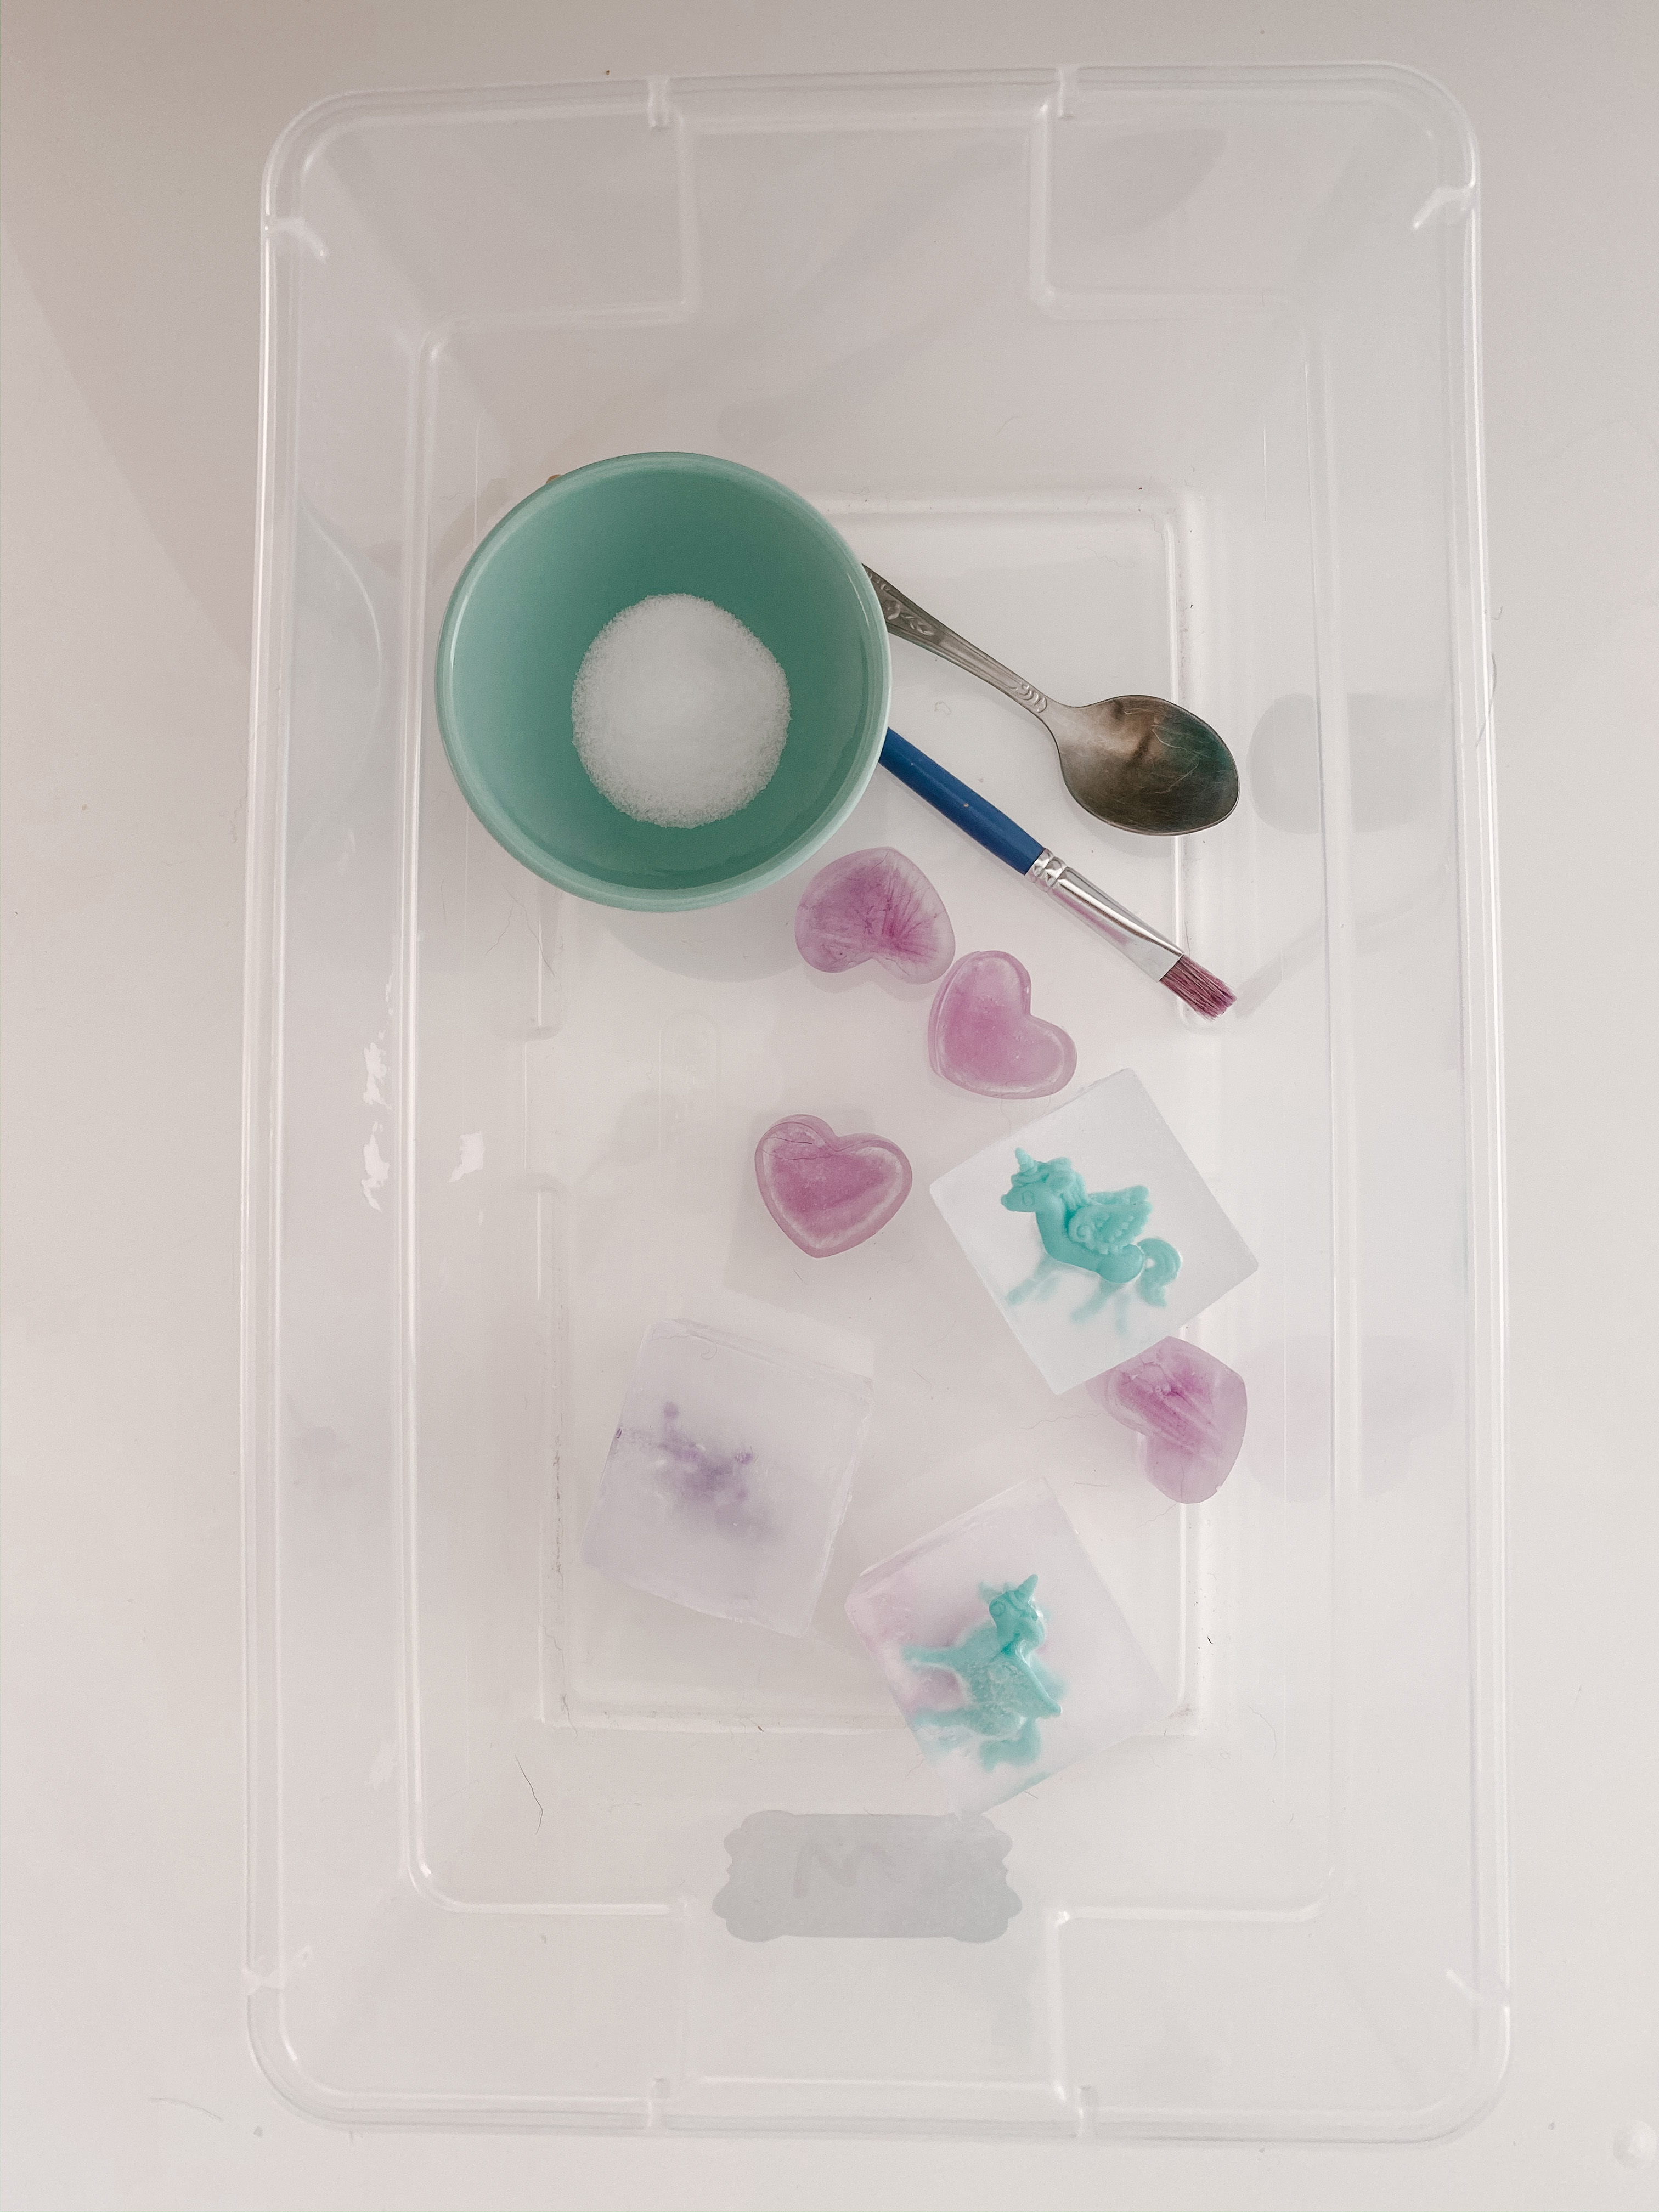
Supplies: Pink trays (order online and pick up in-store, great for so many activities), unicorns were from the Valentine’s Day section at Target, silicone ice cube tray, heart ice cube tray.
Beaded Pipe Cleaner Hearts

Practice fine motor skills and hand eye coordination by threading beads onto pipe cleaners! Help your toddlers twist together to make a heart shape. Piper inevitably ends up making bracelets when we do this but the hearts make a cute Valentine’s Day gift for grandparents or friends, too! For younger toddlers ASSIST them with the process and use LARGER appropriate beads!
Supplies: Pipe Cleaners, toddler-friendly beads (we like these).
Dot Marker Shapes & Letters
We haven’t used our dot markers since Flora got them for Christmas so I know both girls will be excited about this one! For Flora I drew hearts for her to stamp on and because Piper is working on letters and writing I drew words for her to stamp! I also drew letters on index cards for Piper.
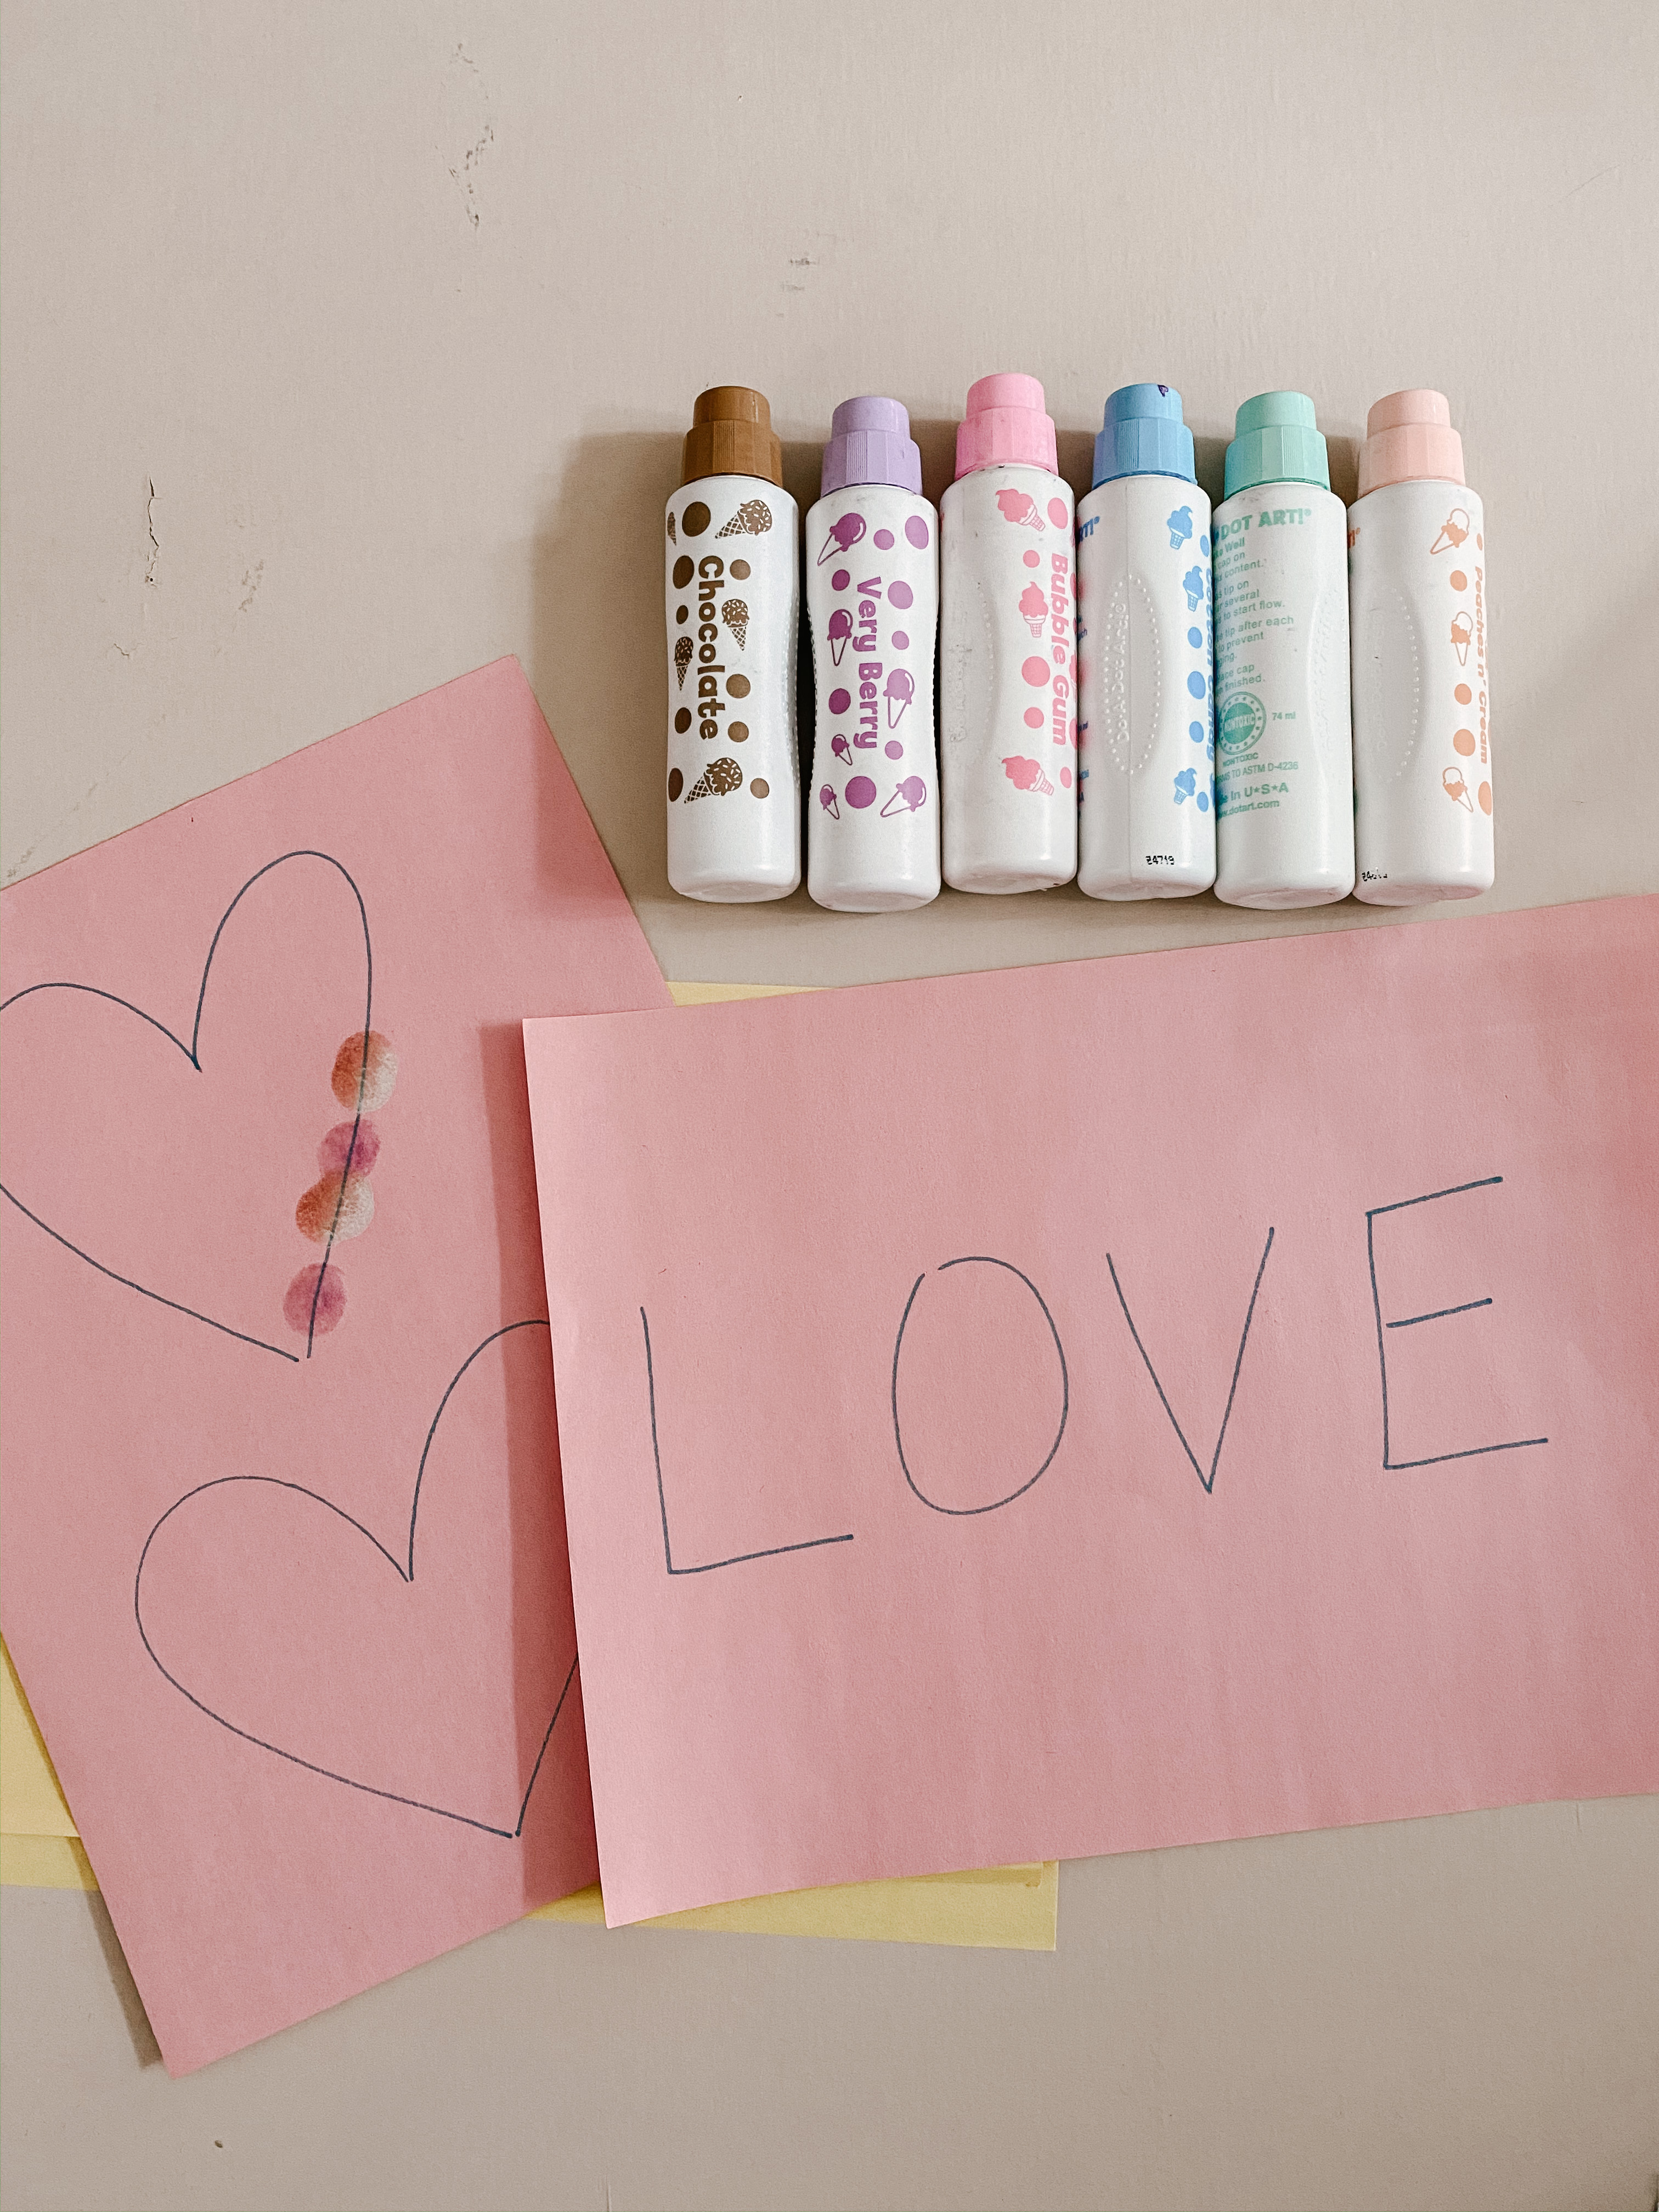
Supplies: Dot markers
Marker Cars
Very excited about this one!!! Flora loved it and I know Piper will have fun with it too. It’s been on my list to do ever since I saw it on Pinterest ages ago but I keep forgetting! All you do is use masking tape to adhere a marker or crayon to the back of a car. Then create a paper surface for your kids to have fun with! I taped down a roll of brown paper I had but you could also tape down paper grocery bags! I found that larger cars work best for this vs. matchbox size cars.
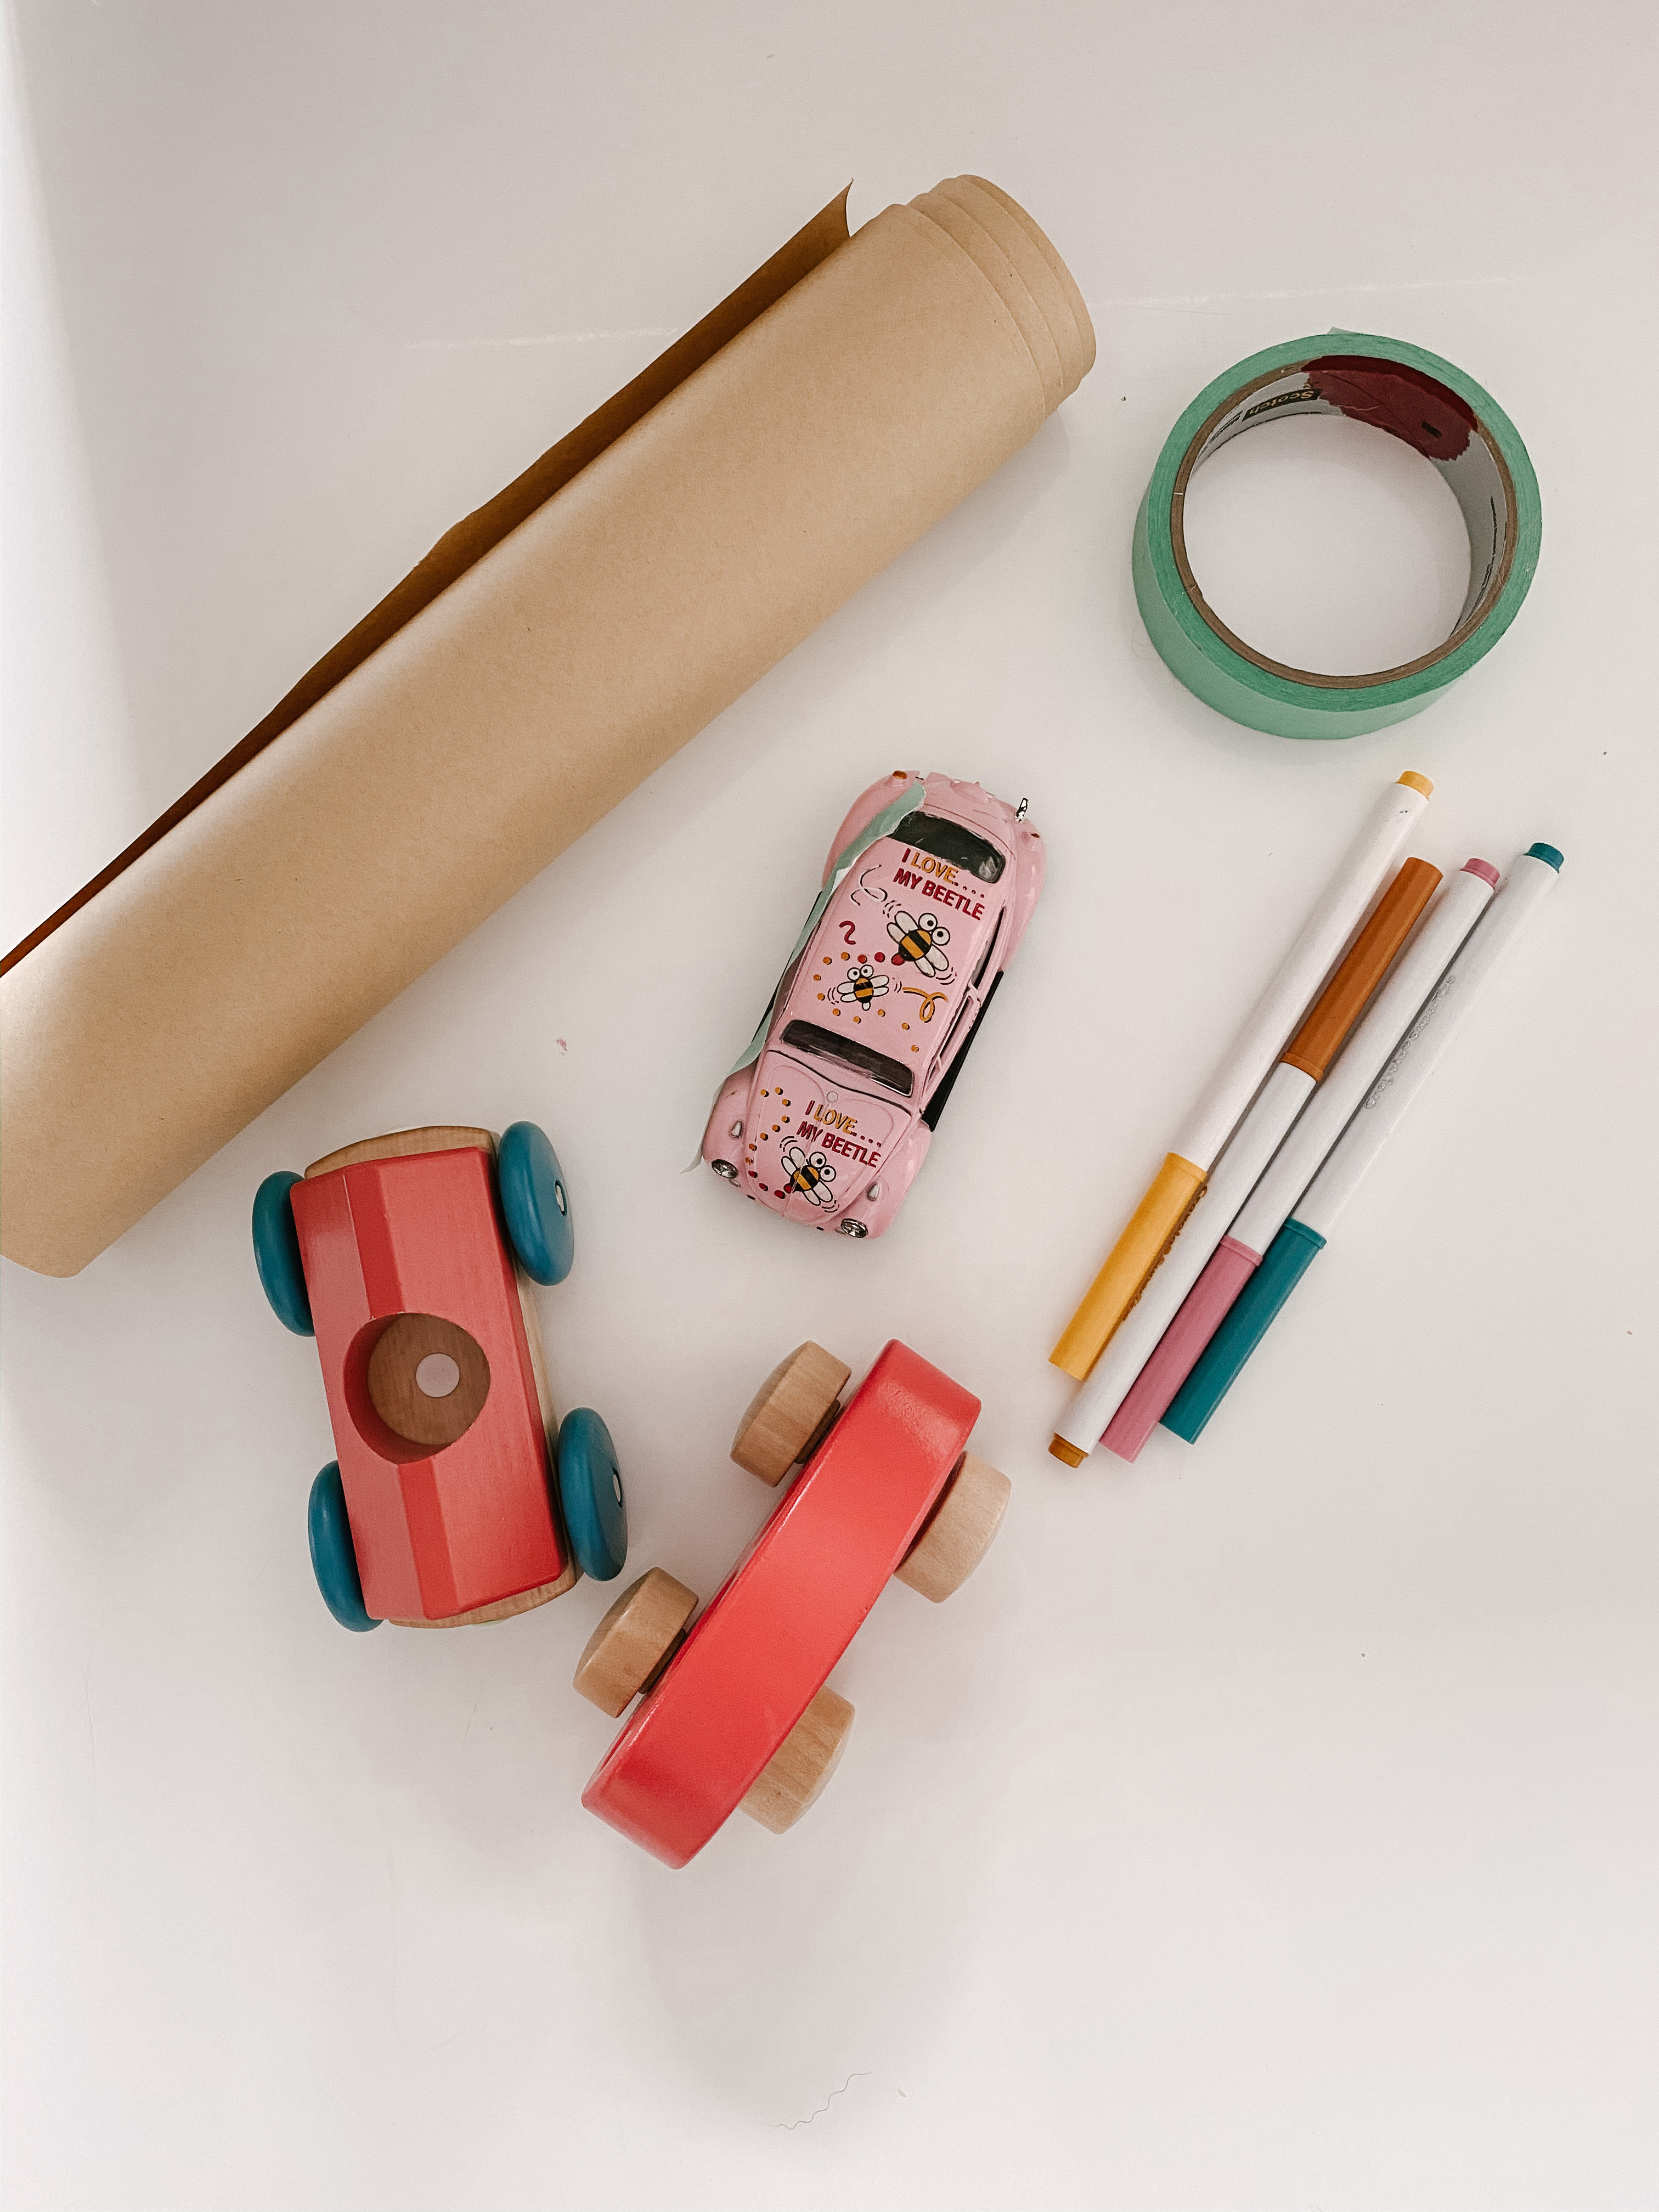
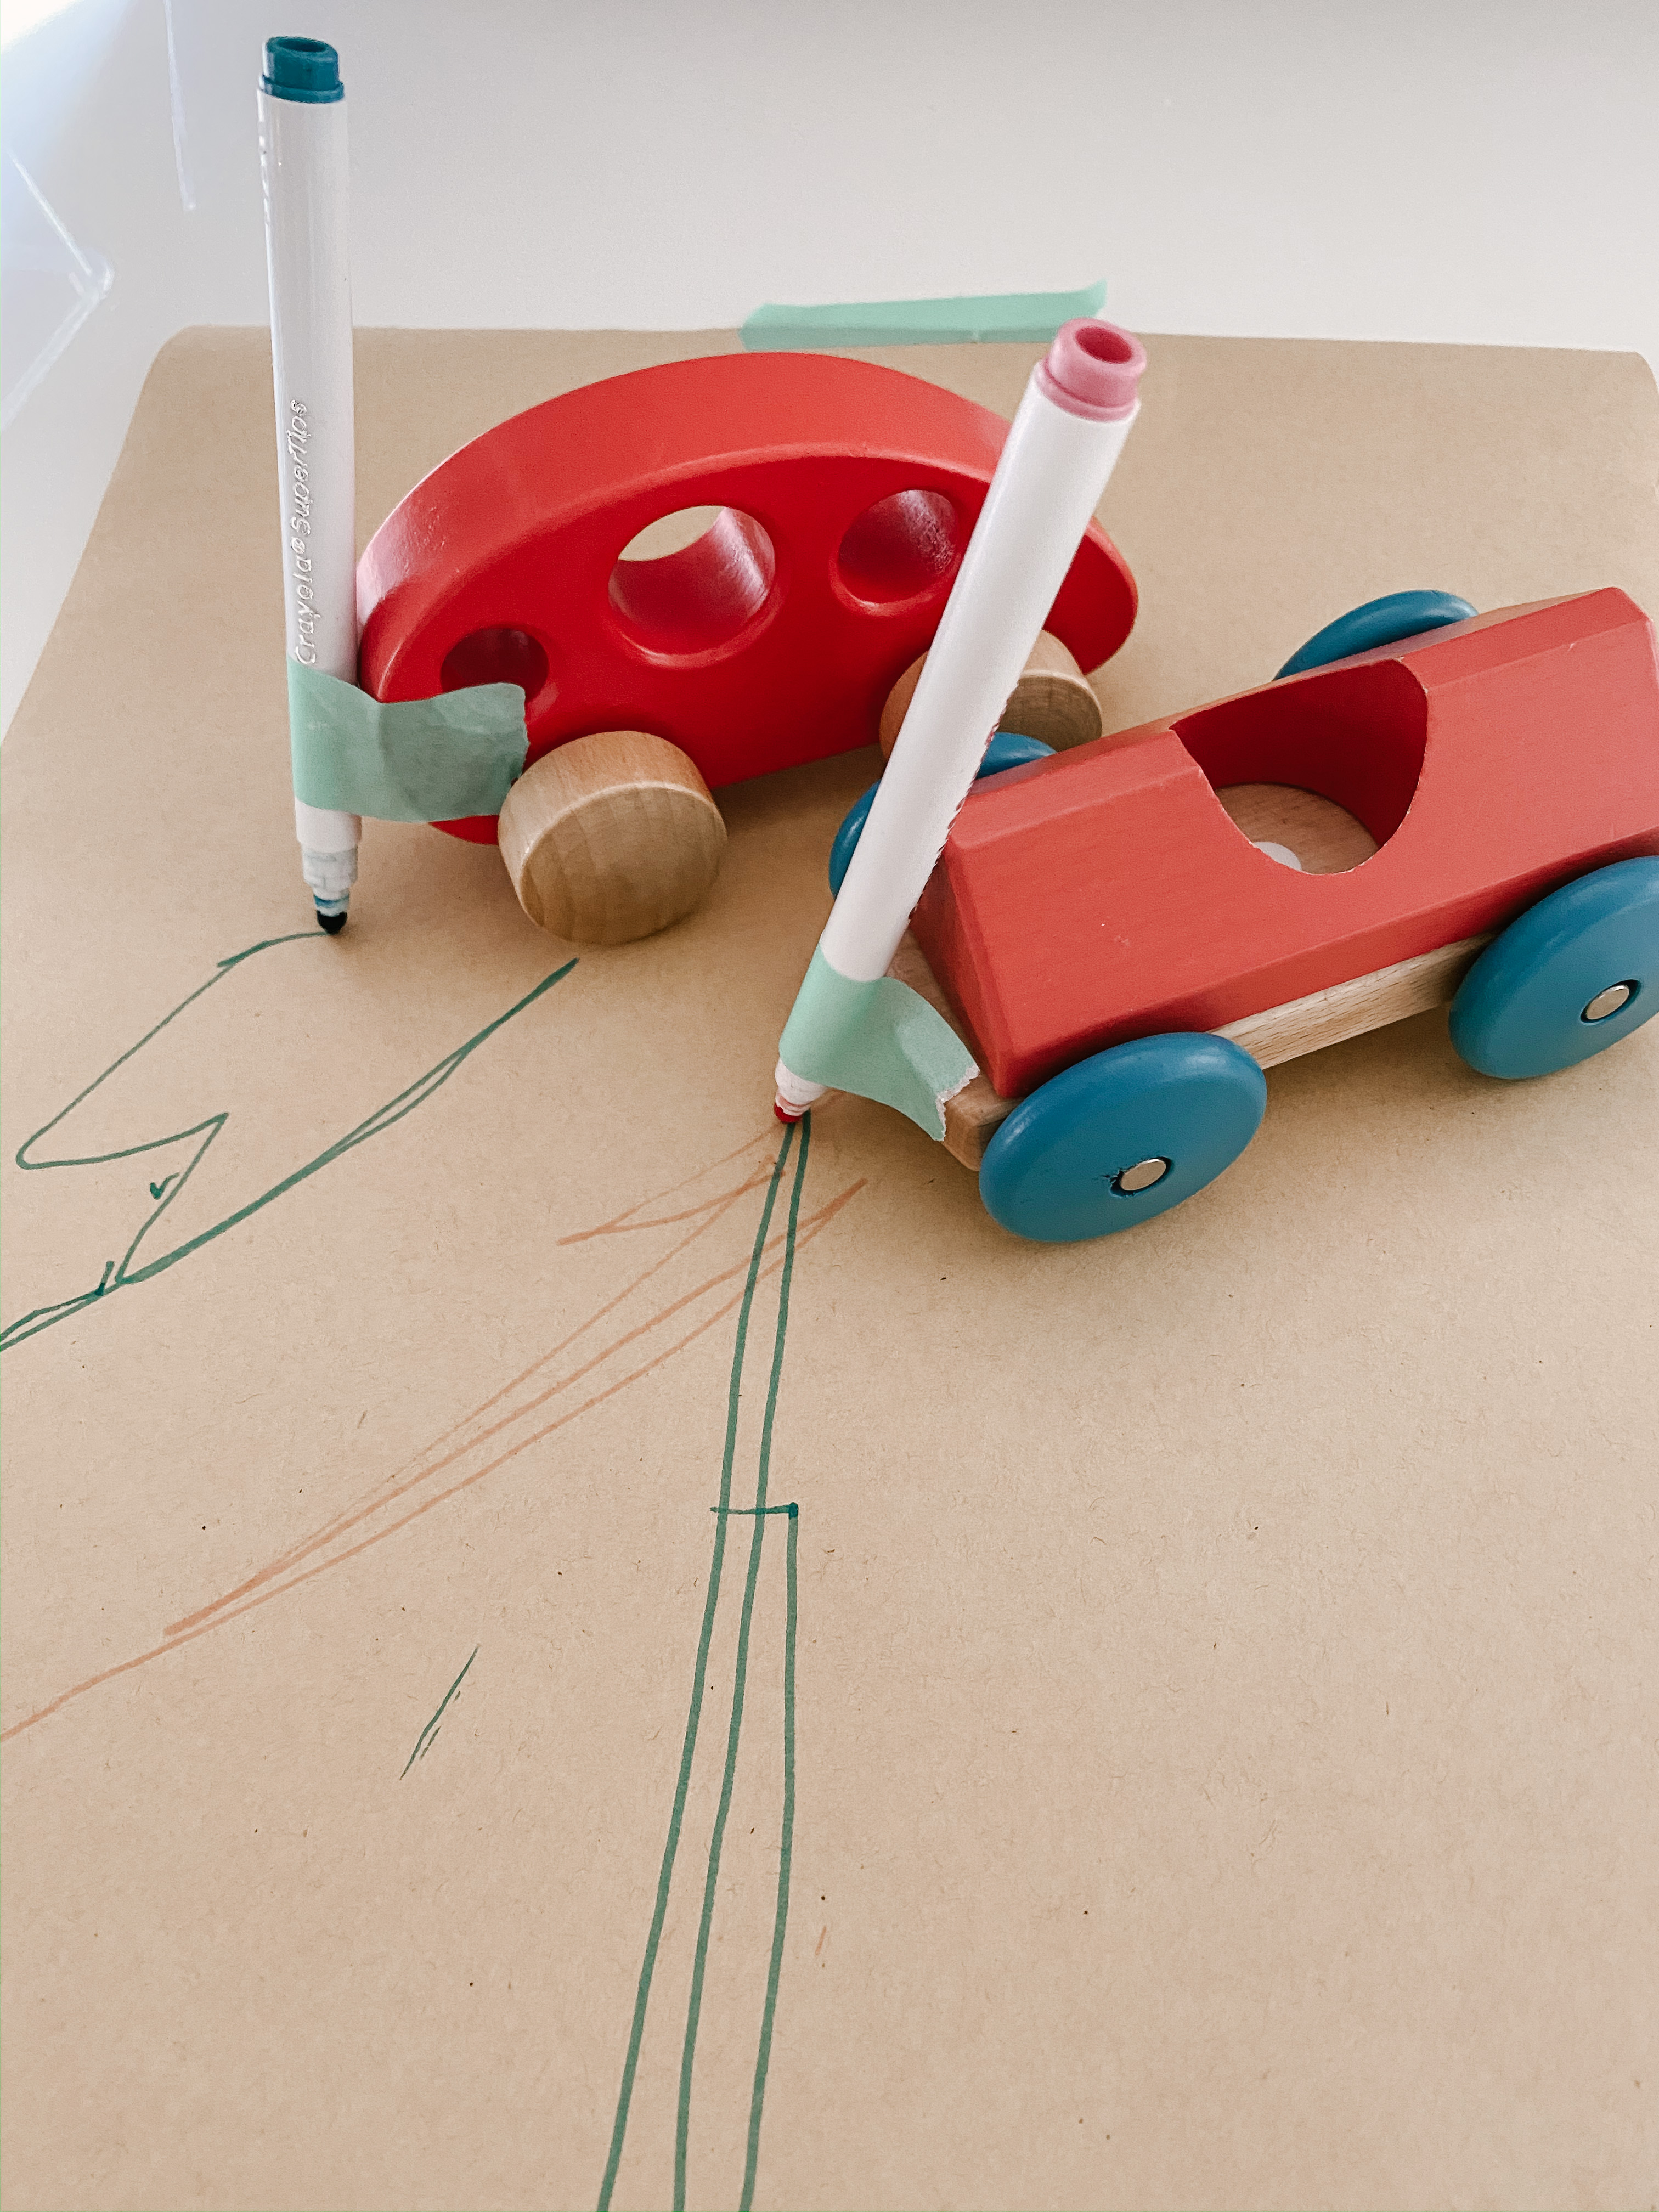
Supplies: Masking tape (love this colored stuff), red car shown, Tegu car shown, markers.


these are all great ideas! I’m going to try some out with my little one this week.
Stephanie | SPV Living